: Bookmarks = A Carton + Fabric :

Friday, April 30, 2010

There is a huge rave about the new Kindle, but I personally still prefer reading books. I like to hold the actual book itself and turn the pages and trace back by looking in the table of contents or the index..... I like books! But often times, I find myself refering to many books at one time and I can't always remember where I left off. So, I found this bookmark tutorial on Punkin Patterns, but I then decided to make it a little different, as I usually do.


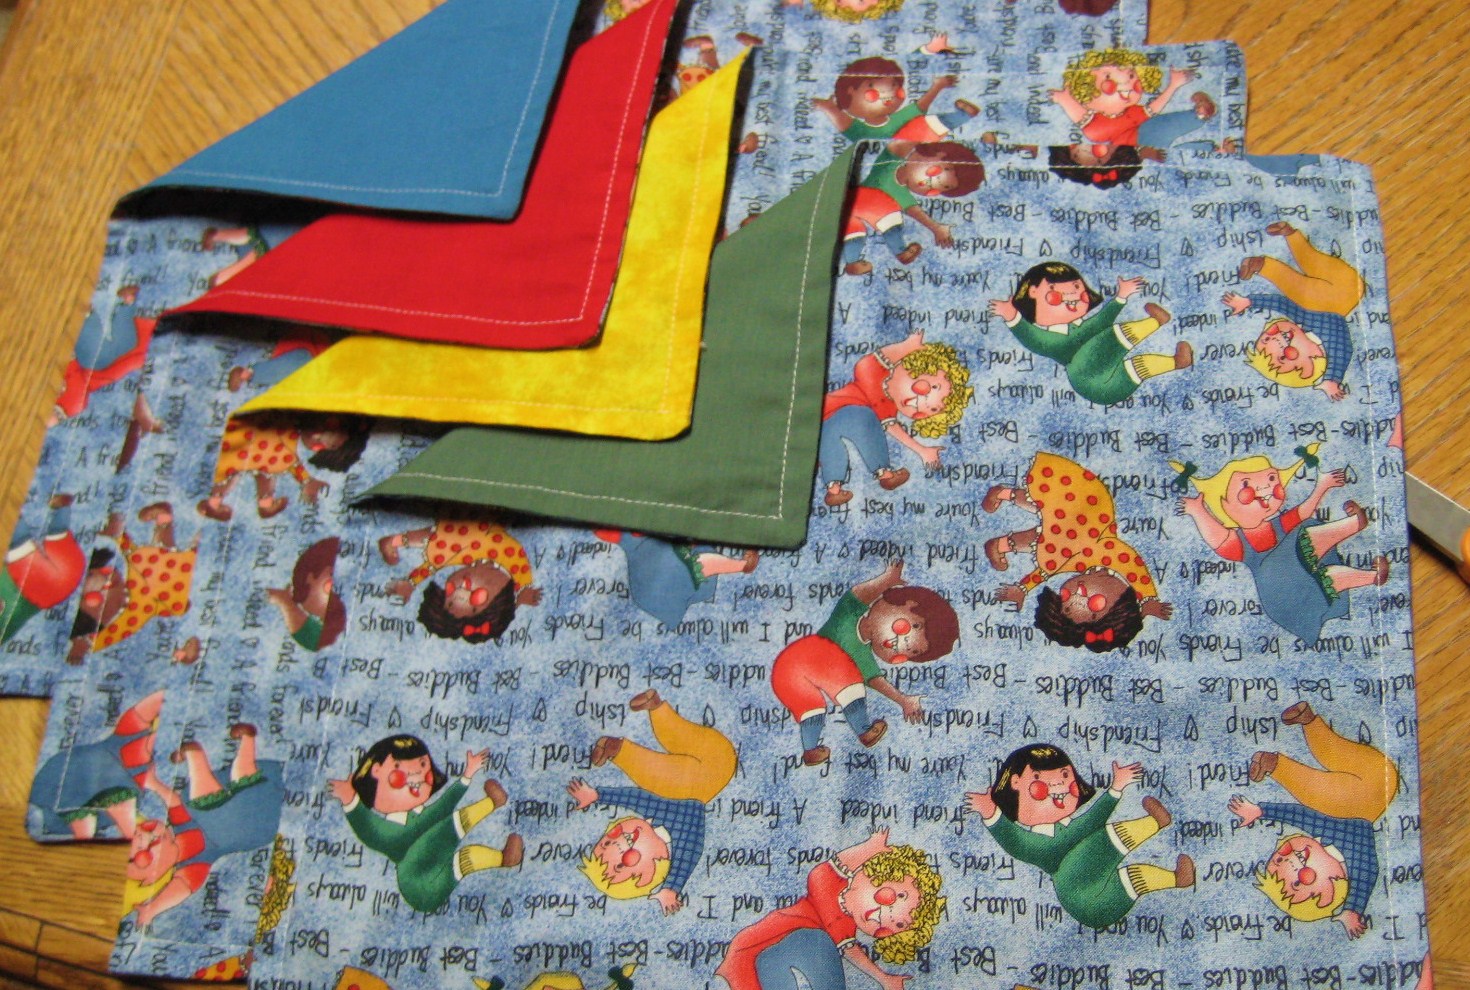
Essentially, I used a rice milk carton and scrap fabric to sew up these bookmarks. I was able yield 6 long rectangles from one small carton and I cut pieces of fabric just a bit bigger than the rectangles themselves. I pinned everything in place and sewed a zigzag stitch around the perimeter. I trimmed the excess fabric and that is it. Note - my sewing was horrible this time around. Again, I am an amatuer and apparently lack common sense :) . I couldn't figure out why the bookmarks weren't moving through the feed, so I figured I just suck at sewing and manually tried to pull it through. Only until I was all done and getting ready to do a straight stitch did I realize I needed to make sure the teeth were up, so as to pull your fabric through. I then remembered that around Christmas time I was attempting to sew buttons, which is why the teeth were down. I have one word for myself....Duh. Yet still, I think it is a project worth sharing.


These also make a great Mother's Day gift, so get started soon, or simply enjoy these functional beauties for your own reading delight.

: Toilet Paper Roll Centerpiece :

Though Earth Day was last week, Earth day truly should be every day. Recycling and finding creative ways to reuse materials is always an eco-friendly choice. I actually got this toilet paper roll centerpiece idea a couple weeks ago and I cannot trace back to where it originated. I will keep searching. Either way, it was fun for my kids to make and they now have a decoration they can be proud of.


We just used 8 toilet paper rolls, a paper plate, glue, and some acrylic paint (doesn't really matter what type of paint you use). I cut the rolls at an angle at varying heights. Meanwhile, Jared painted the plate black. Then he chose different colors and painted each roll. I told him it would be a good idea to paint the insides rather than just the outsides of the rolls, but he insisted on leaving them as they are. You could certainly paint the insides to add to the colorful effect of the centerpiece. After everything was dry (it didn't take very long), he glued them to the plate in sequence and let that dry.


This centerpiece reminds me of a colorful choir..people clad in bright cloaks as they all sing in unison. Ask your child what it looks like to them. Use your imagination, as well, and enjoy making this project with your little ones.

: Scrap Fabric Dish Mat :

Thursday, April 29, 2010

This project wasn't made for or with the kids, but it is still very cute and simple, and I had to share. I love reusing old stuff to create new things. The other day, I found this kitchen towel mat tutorial on Toad's Treasures and decided to create one of my own.


Seeing that you can go to Toad's Treasures for the tutorial, I will skip the materials and directions this time around. I will just show you a photo progression of the project. Visuals always help me better than just wordy directions.


I hope you enjoyed this visual tutorial, in addition to the actual tutorial. Get sewing. Use your scrap fabric. Use an old dish towel. Get creative. Get Inspired.

: Cute Cloth Napkin Set :

My preschooler attends a local Montessori school. His particular school requires that he brings a cloth napkin in his lunch every day. I bought him some white napkins originally, but I recently decided they are a little boring. So, I decided to make a few napkins that have some character.


Materials

4  13-inch squares of your pattern fabric
4  13-inch squares in various matching colored fabric
Sewing Machine
Pins
Scissors
Thread in color of your choice


Directions

  1. Pin your solid squares to your pattern squares, right side facing inward.

  2. Sew a straight stitch around the perimeter, leaving a small opening at one corner. Unpin.

  3. Flip inside out. Iron edges. Sew a seam around the perimeter, making sure to tuck in the seam where the opening was.


This project is fun and easy for any stitcher of any level, especially for amatuers like me! Enjoy fumbling through your fabric stash and creating some cute double-sided napkins for school/work lunches, picnics, or meals at home.

: Fresh-Squeezed Orange Juice :


Squeezing fresh juice from oranges in the morning has been a long-time tradition that has been somewhat lost with the convenience of store-bought O.J. We are guilty of this, as well. But there have been these organic oranges in our fruit bowl beckoning me to use them and I happened to spot a little juicer at the store for about $3.00. So, I thought it was meant to be.


A gratifying activity, juicing oranges can be done almost entirely by your preschooler or even your toddler (you will likely have to finish because they may not have the strength to get all the juice out).

: Decorative Switchplates :

Wednesday, April 28, 2010

I came across this simple, stylish fabric covered switchplate project today on Do Ah Diddy. I am going to be making a quilt soon with blues and browns, so I decided to make use of one of my chosen quilt fabrics.


I basically just cut out a peice of my fabric bigger than the switchplate itself. I took a paintbrush and generously coated it with Elmer's glue. I placed the fabric piece onto the switchplate just how I wanted it.


I cut slits in the facric where the light switch sticks out and tucked them onto the backside and secured them with more glue. I poked holes where the screws go, as well. Then, I let it dry for a few hours.


After that, I went over all the surfaces with Mod Podge and let that dry.


I reinstalled the kids' switchplate back in the their room and my 4-year-old was entirely stoked over it. Great quicky project...that is my favorite kind!

: We Love Backyard "Weeds" :

The rain comes, the snow comes, the sun comes, then the clouds and the snow come again, then the rain, then the.... The weather here is so wishy washy, but finally I think the snow is gone for good until next time around. We had a few sunny days until it began to rain again today, so I decided to capture the beauty of a couple commonly overlooked beauties of nature out back near our vegetable garden and the kids' play area.


Great Big Meadow of Teeny Weeny Flowers


Magical Energy Burst; soft but tough.


Stretching Sun; Reaching Limbs, Yawning Face

: More Flowers For Little Ones :

Flowers are things of Spring. They are things of beauty. They are things of life and of color. Flower are great for awakening your child's mind and imagination, both boys and girls. Here a couple simple, thrifty ways to make flower art with your toddlers and preschoolers.


Field of Flowers

Cost: Not even 2 bucks

Materials:
Various colors of paper streamers or tissue paper
Green pipe cleaners
Green construction paper
Scissors
Glue
Tape 


Directions:

  1. Draw zigzags horizontally across the center of your construction paper. Have your young one cut along the lines. Mount your grass in a long row.

  2. Tuck and bend your pipe cleaners where you want your flowers to be. Tape at the top of each (they will be covered by the flowers themselves).

  3. To make your flowers, take a pretty long strand of streamer from your roll. Your kids will have fun crumpling these up and spinning a little, then gluing the loose parts. Also, make sure they make little centers for their flowers by pulling off 6-inch pieces and crumpling really tightly. Glue them on the flowers.

  4. Allow to dry for several hours (we waited til the next day). Use double stick tape or fold tape onto itself so that it is sticky on both sides and mount each flower to its stem, making sure to cover the tape at the top of your pipe cleaners.

  5. Additionally, you can create leaves with pipe cleaners, construction paper, etc... 


Wooden Flower Corner

Cost: About $3.25

Materials:
Wooden flowers ready to be painted
Paint


Directions: 
1. Get your wooden decorations (I bought mine from the dollar store) and red, yellow and blue paints.
2. Have your child mix red/yellow, red/blue, blue/yellow to yield orange, violet, and green.
3. Now, simply paint.

  
This makes a great window sill decoration, addition to a nature table, or put these anywhere that will add some personal springtime joy to your child's environment.


There are so many ways to create springtime flower crafts for your little ones. Look around. See what you come up with and let your child's imagination bloom.


: Brown Rice Pudding :

Monday, April 26, 2010

My kids periodically ask me to make rice pudding for them. It has become somewhat of a tradition in our family. We make it a little different every time, but I will share how we made it this time around. Making brown rice pudding is a healthy way to add delicious flavor to your breakfast, snacktime, or dessert.


We simply used about 2 parts water, 1 part brown rice, about 2 parts milk or alternative milk (soy, rice, almond...), brown sugar or honey, cinnamon, and currants or raisins.

Directions
  1. Bring water to a boil. Add rice. Bring back to a boil. Turn to low and cover. Cook brown rice for about 45 minutes.
  2. Add milk. Cook on medium-low 10 minutes or until thick and creamy, stirring frequently.
  3. Add the cinnamon, honey, and raisins.
  4. Serve it warm or chill it for snacking on later.
Create your own variation or enjoy the recipe as it is shown here. Include your children in pouring, mixing, measuring, and stirring. Talk about the changes in the milk being a liquid to it turning to a creamy solid. Talk about the initial absorption of water by the rice. There are so many ways to involve your kids. Plus, there is nothing like being able to taste their own work. Brown rice pudding is great for all seasons and an inexpensive way to share delicious creations with the ones you love.


: Wool Felt 'N' Buttons Matching Game :

Sunday, April 25, 2010

Time to make an easy game for the little ones to do! There is nothing like a good old-fashioned memory game for kids. Challenging and fun! Easy and quick to make!

I originally got this idea from Andiland, but modified it slightly to my own liking. We had all these cute little buttons, but I didn't know what to use them all for. So, this project was a great way to effectively use them so that the kids would thoroughly enjoy them: trains, rockets, ladybugs, etc...


Materials

2 colors of wool felt
Squiggly scissors (regular will do, too)
An assortment of buttons
Tool for measuring
Pins
Needle
Embroidery Thread


Directions

  1. Measure 24 2-inch squares on one sheet of felt.

  2. Line it up with your other color and pin each square to the other felt sheet.

  3. Now, cut with your fun squiggly scissors on all sides. You should now have 24 pinned squares.

  4. One at a time, unpin each square, sew a button to the center of your chosen color, then sew the 2 pieces together around the edge. Simple as that!

These can be done in a bigger size, with synthetic felt, with any sort of buttons, in a bigger or smaller set than 24..... The possibilities will be up to you. Enjoy creating this game and I hope your young ones enjoy playing with these 3-dimensional matching game pieces.

: 3 Little Birds ~ Made With Recycled Clothes :

Friday, April 23, 2010

Still an amatuer user of the sewing machine, I attempted to make cute little stuffed birds for the the kids. We were focusing quite a bit on birds and I thought it would be spring-like to have these toys around.

Materials

Old jeans or corduroy
Scrap fabric
Thread
Sewing Machine
Needle
Stuffing
Embroidery thread

Directions

  1. Draw your pattern, cut it out and trace it on your fabric twice, flipping it once so you get one left and one right side of your bird.

  2. Make a pattern for your wings and do the same as you did for the body. Do this for the beak, as well.

  3. Pin your beaks and wings onto the bodies. Sew them on with your sewing machine.

  4. Then, put the 2 sides of the bird bodies together inside out. Starting from the breast of the bird, sew up and around until you reach about 2 inches from where you began.

  5. Stuff the bird from the opening at its belly and sew it up when you are finished stuffing.

  6. Use your dark embroidery thread to make eyes. And now you are finished.

This project is great for young stitchers ages 7 and up, and for parents who want to create a simple handmade gift for their little ones.

: Spring Flowers Garland :

Spring is a time of color, life, gardens, wildflowers.... Why not celebrate the very essense of the season with your little one. This project is a cheap way to entertain your kids and decorate your house for spring.

Materials

Green yarn of choice
3 to 6 bouquets of fake flowers
Needle


Directions

  1. Pluck each flower and leaves from the bouquets.

  2. Thread your needle with your yarn and get ready to start stringing.

  3. Take the center out of each flower individually as you get ready to string them onto the yarn.

  4. Push your needle through hole in the center and pull about 3 feet or more.

  5. Do the same with the leaves, alternating between flowers.

  6. Once you are done, cut the yarn to the desired length and tie both ends each in a loop so it can be easily hung.

  7. Separate the flowers evenly how ever you like.

  8. Hang it either verticly hanging or draped horizontally.

: Cozy Cardboard Cottage :

Celebrate Earth Day by making a carboard box cottage with your child. I got this idea from Sweet Fancy who created a quaint gift box out of hers. We decided to make ours a bit different.

My preschooler and I used a small cardboard box, packaging tape, scissors, scraps of fabric, and a gluestick. We guided eachother as to what we would include and he had the final say as to how it would be done. He wanted a window with shutters above, a dog house, grass all the way around, a red door similar to Sweet Fancy's, spring-inspired curtains, a dog house, and a bicycle, although we compromised and decided on a ball this time around. He also picked out the fabric and helped with gluing.

On the side of the house we made somewhat of an English garden with very full rosebushes (also to cover the ugly packaging sticker on that side). In the backyard, he decided on a garden and told me we needed a brown strip of ground for what was going to be the vegetable garden and ended up being the flower patch. We added windows and designed a yellow kiddie pool similar to the one we have.

Have fun and get creative reusing a packaging box. By the way, you will need a little more cardboard to make the roof because the existing long flaps will not be long enough. You can paint it, use construction paper or use fabric as we did. We like the fabric because it creates a rich, lively feeling and it has a better quality when touched. By all means, add your own personal touches when decorating your house. Fun to make and satisfying to look at again and again.

: Egg Carton Counting :

Thursday, April 22, 2010


Earth Day is here! There are so many ways to take care of our environment, including the reuse of household recyclables. For instance, egg cartons have countless possibilities when it comes to transforming them into other things. We will continue to use egg cartons for crafts and activities. We have already created starters for seeds with cartons that were leftover from Easter. Today, Jared used an egg carton as a counting board with individual pouches for each number.


Materials
One dozen-sized egg carton
Lentils or other dried legumes
Paper
Pen
Scissors
Tweezers

Directions
  1. Simply write numbers 1 through 12 on your paper (I used an index card because it is thicker), then cut them out to fit into each slot of the carton.
  2. Fill a small container with your lentils (use lima beans if lentils are too difficult).
  3. Demonstrate to your child how to pick up each lentil with the tweezers and set it in each slot. Also, explain to them that the object is to put as many lentils in each slot as the corresponding number calls for.
Other Comments
This activity is wonderful for your preschooler's fine motor skills and coordination, therein. It also reinforces math/counting skills by associating the written number with actual objects counted to that number, and it gives a 3-dimensional look at numeric sequence. So, don't throw away that egg carton. Create an easy, frugal counting activity for your young child.

: Transforming Egg Cartons Into Seed Starters :

Monday, April 19, 2010

'Tis time to start gardening! There is nothing like the gratitude children get when they plant seeds and can watch them grow into plants that can further gratify by producing tasty, colorful food. This project from Growing Up Creative is great for Earth Day. It is biodegradable, it prevents the unnecessary purchase of supplies, and it is fun for the kids.

 My 2-year-old practiced scooping soil into each nook of his egg carton, while my preschooler carefully distributed soil to his own. He chose several different seeds from which to choose, including romanesco broccoli and 6 different types of heirloom tomatoes. He planted them and covered them with more soil, and we kept track by him drawing grids of his egg carton that are now hanging just above them. Lastly, we watered each little pod and covered it with a cutout from a plastic bag. Within a week we will be seeing some progress.

Related Posts with Thumbnails